
How to extend your SAP Marketing Integrations with Post-Exits in SAP Cloud Platform Integration (Part-2)
This blog is the successor to this blog. I highly recommend that you read it first before proceeding with this one especially if you don’t know the meanings of the notations (Message A, Message B, etc.) that we use in this blog. The predecessor blog explains all of them.
This part is going to solely focus on configuration activities.
Configuration Activities
1. Preparation of Integration Package “SAP Cloud for Customer Integration with SAP Marketing”
You need to log in to your SAP Cloud Platform Integration (CPI) tenant with your credentials. You need to navigate to “Discover” page and find the integration package “SAP Cloud for Customer Integration with SAP Marketing”.
After you copy it, your copy will be available in “Design” tab in your CPI tenant. These activities are already explained in the documentation of the standard integration package here. You need to read “Integration with SAP Marketing via CPI” or “Integration with SAP Marketing Cloud via CPI” documentations depending on your deployment.
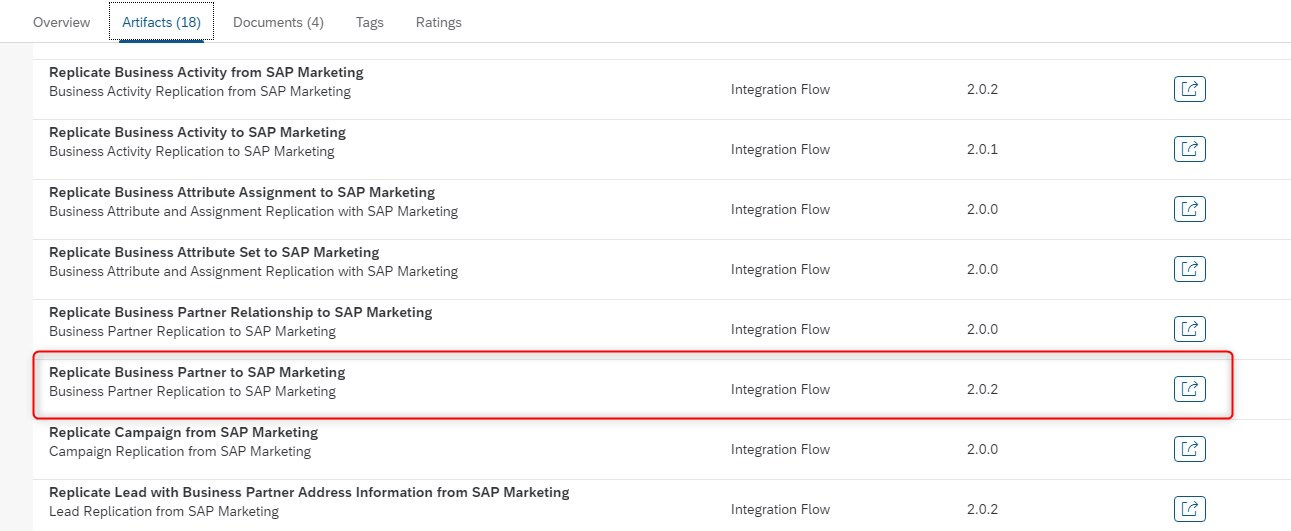
When you check out the copied package in “Design” tab, you can spot our integration flow “Replicate Business Partner to SAP Marketing` in the list of “Artifacts” tab (Figure 1.5)
You need to configure the integration flow by following instructions in the documentation of the standard integration package.
During the configuration of the integration flow you need to take note of two points:
– You need to set `Extension Implemented” to “true” in integration flow configuration (Figure 1.6)
To do that, simply go to “More” tab and type “true” (all lower case) for the parameter named “Extension Implemented”. This indicates we have an extension scenario and standard integration flow should call our post-exit flow that we are going to create.

– You need to note down the address of the Post-Exit flow because it will be really important during the design of our Post-Exit Flow.
To find out the address of Post-Exit reference, you need to go to “Receiver” tab and pick “Business Partner Replication Post-Exit” from the drop-down list for the “Receiver” parameter. The address should appear as shown in Figure 1.7.

After you’re done with other configurations for “Replicate Business Partner to SAP Marketing` you just need to save your settings.
That’s it, there’s nothing we should do about the standard integration flow from this moment on. Now we’re getting on to design our Post-Exit flow.
2. Designing Post-Exit Flow
To design our Post-Exit flow, we need to create an integration flow in our integration package. For the Post-Exit concept to work properly, your standard integration flow has to be in the same CPI tenant as your Post-Exit flow. We’re going to create our Post-Exit integration flow in the same integration package with our standard integration flow, so this prerequisite will already be fulfilled.
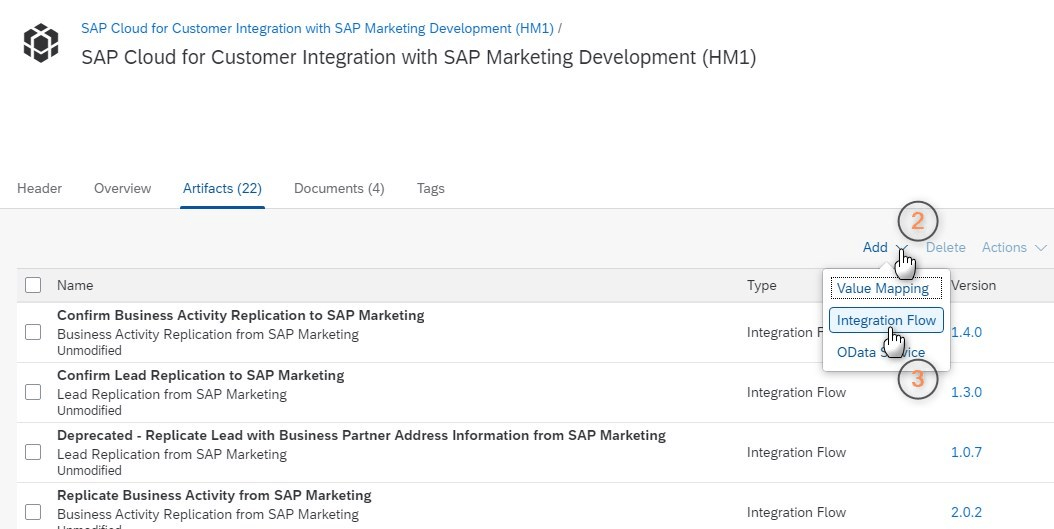
To create our Post-Exit flow, you can follow below screenshots (Figures 1.8 – 1.10)
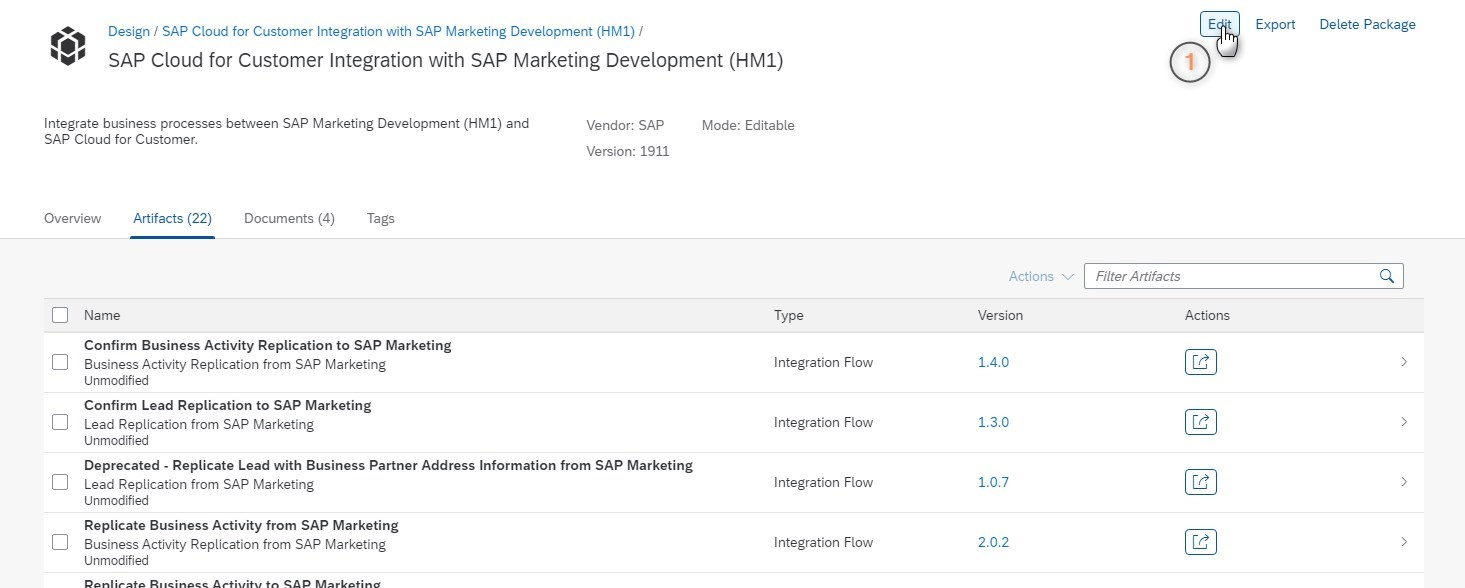
I normally give the same name as the original standard integration flow and add “Post Exit” as a suffix. This way our post-exit flow gets listed right after the original standard integration flow in the list of “Artifacts” tab in our integration package. You can easily spot your Post-Exit flows if you stick with this namespace pattern.
| Field | Description | Value |
| Name | You can choose the same name as your original integration flow and provide “Post Exit” addition at the end of it | Replicate Business Partner to SAP Marketing Post Exit |
| ID | Should be populated automatically based on the name | – |
| Product Profile | Do not change it | – |
| Description | Description of your Post-Exit flow. You can type anything you like here to describe your Post-Exit flow purpose | Post Exit During Business Partner Replication to SAP Marketing |
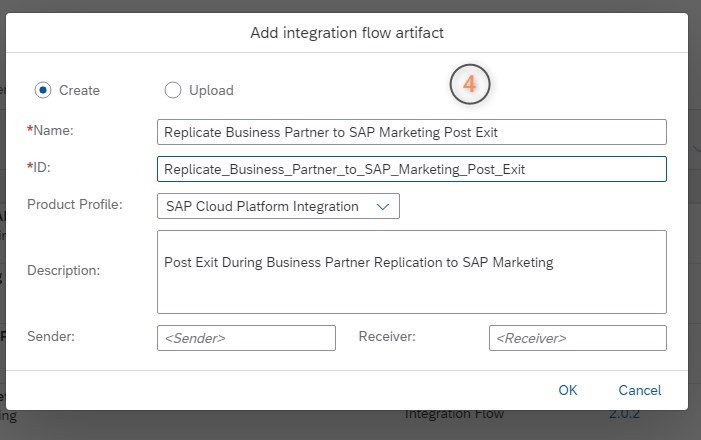
Finally click “OK” to save your Post-Exit integration flow.
2.1. Defining Process Adapter and Message Mapping
Now we’re going to design an integration flow as shown in Figure 1.2 in predecessor blog.
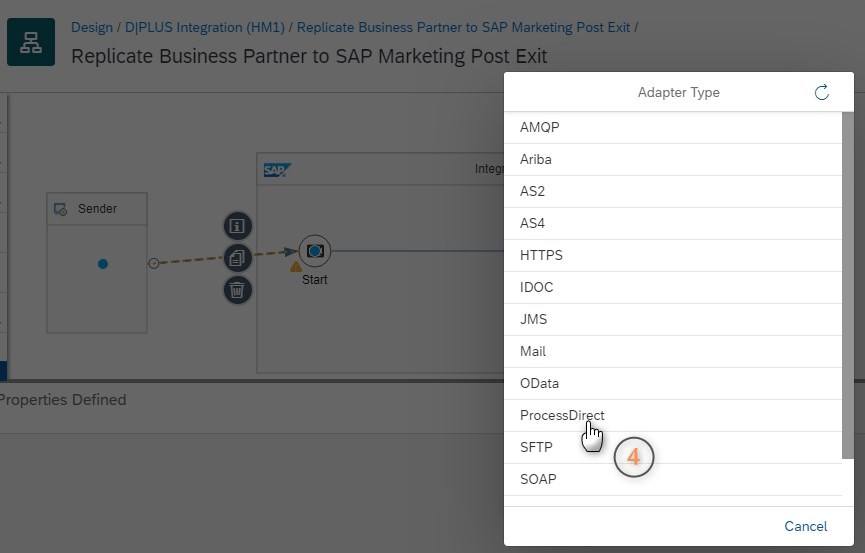
Let’s start with “Process Direct” adapter. You can follow the screenshots below for the instructions (Figures 1.11 – 1.14)
Select “Connectors” from left lane menu and click on “Sender” box, next draw a line to the “Start” icon with Drag&Drop.

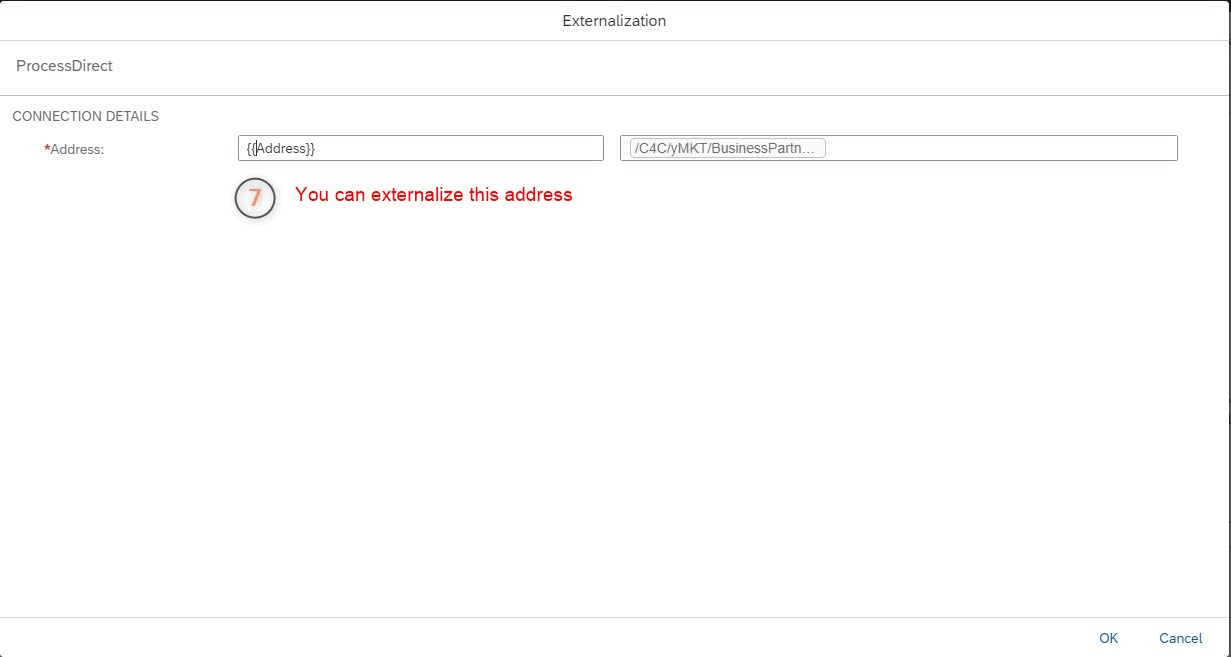
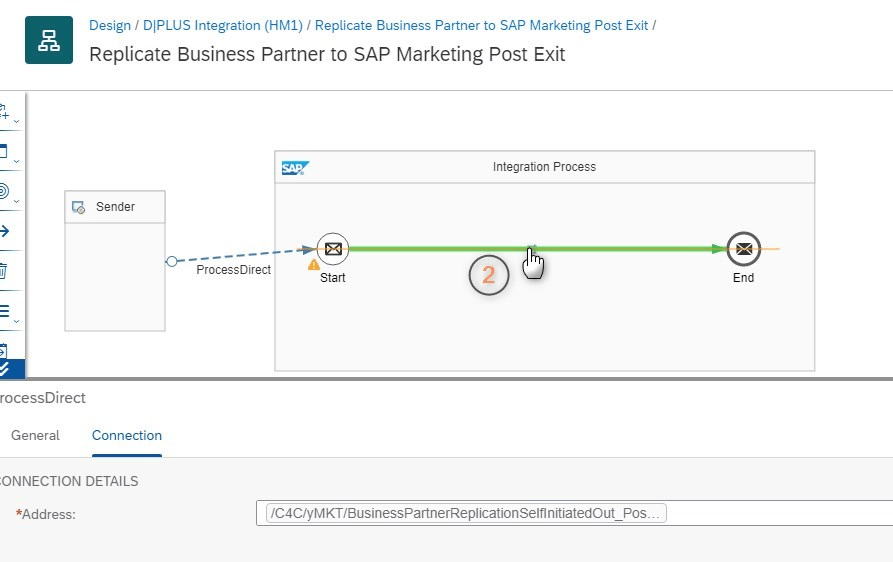
Now, here’s something very important. On the “Connection” tab, for the “Address” field, you need to type down the exact address you noted in Figure 1.7

You can optionally externalize this parameter so that you can also maintain this address while configuring the Post-Exit flow.
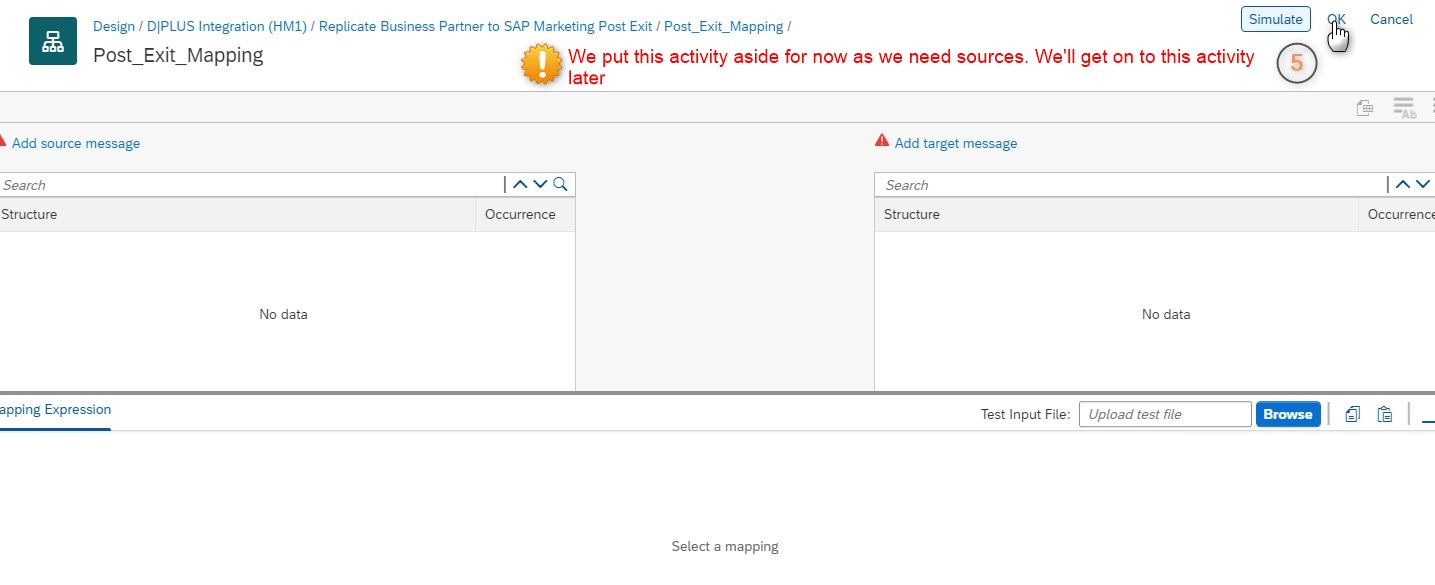
Now we need to create a message mapping for our own mapping. For instructions, you can follow screenshots below (Figures 1.15 – 1.19)


We added the required elements to our Post-Exit flow. Now we need messages (Message A, Message B and Message C) to perform our own mapping.
2.2. Getting Extended Metadata of C4C SOAP Service (Message A)
The creation of custom field (ZZMKTS4ID) and enabling it for relevant web services in SAP C4C is not part of this blog. These administration activities are normally done by C4C consultants.
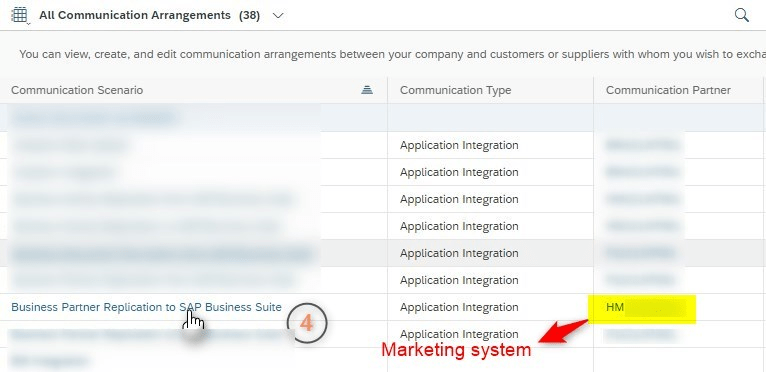
To download extended metadata of the SOAP service (including our custom field), log in to SAP C4C with your credentials. You need to find the corresponding communication arrangement for your integration scenario and download the WSDL from there. For our scenario, the communication arrangement is “Business Partner Replication to SAP Business Suite” for marketing communication partner.
You can follow the screenshots below for instructions (Figures 1.20 – 1.22)


You can optionally rename your WSDL file after you download it.
2.3. Getting Standard Metadata of SAP Marketing OData Service (Message B)
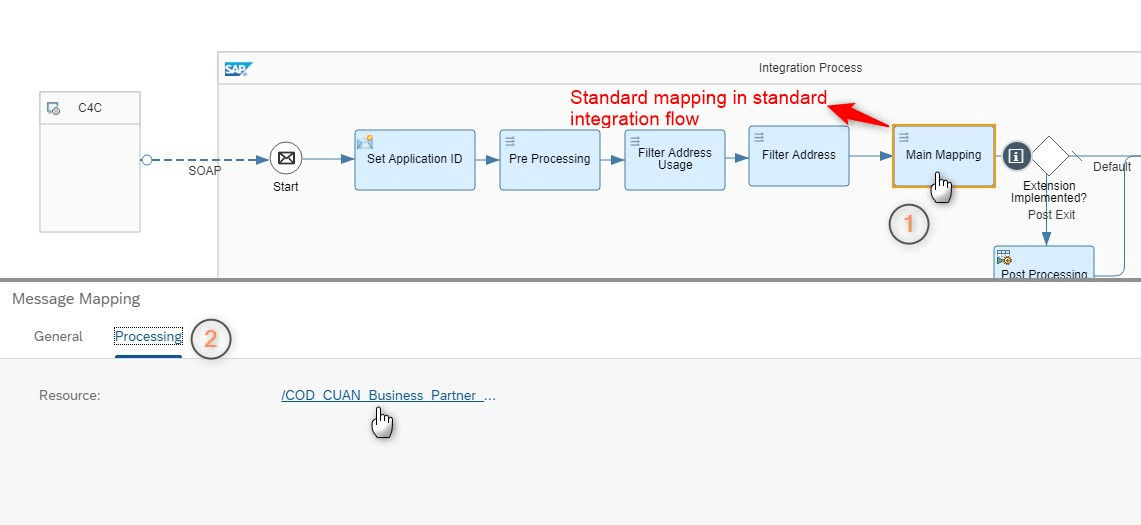
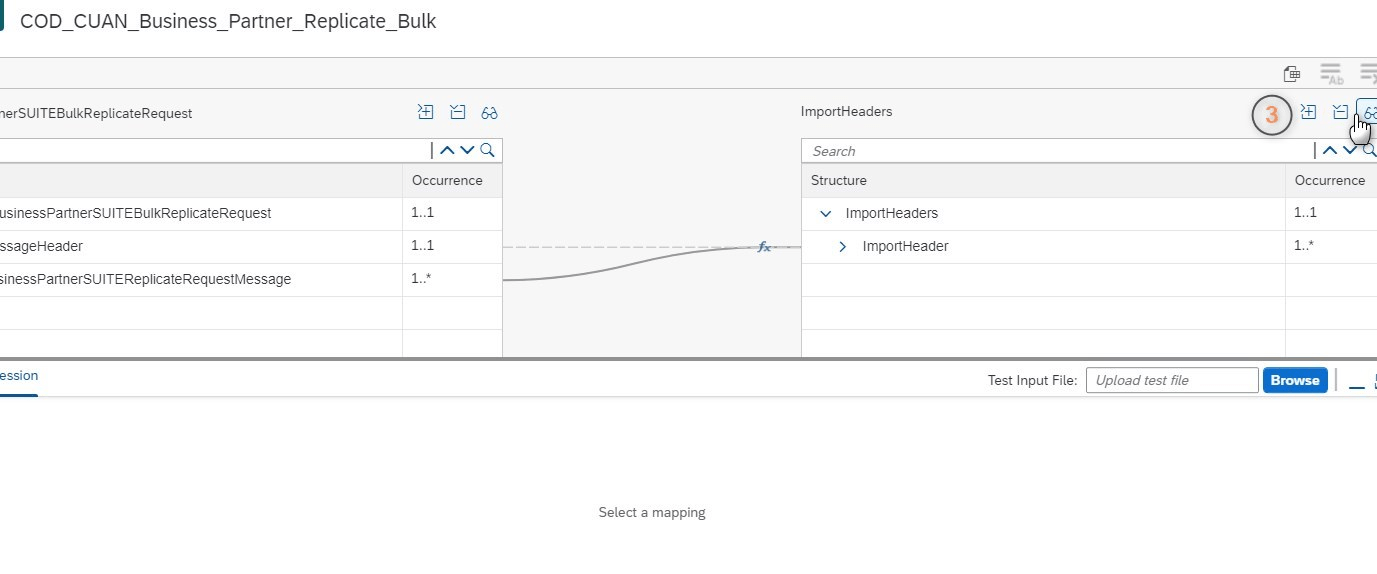
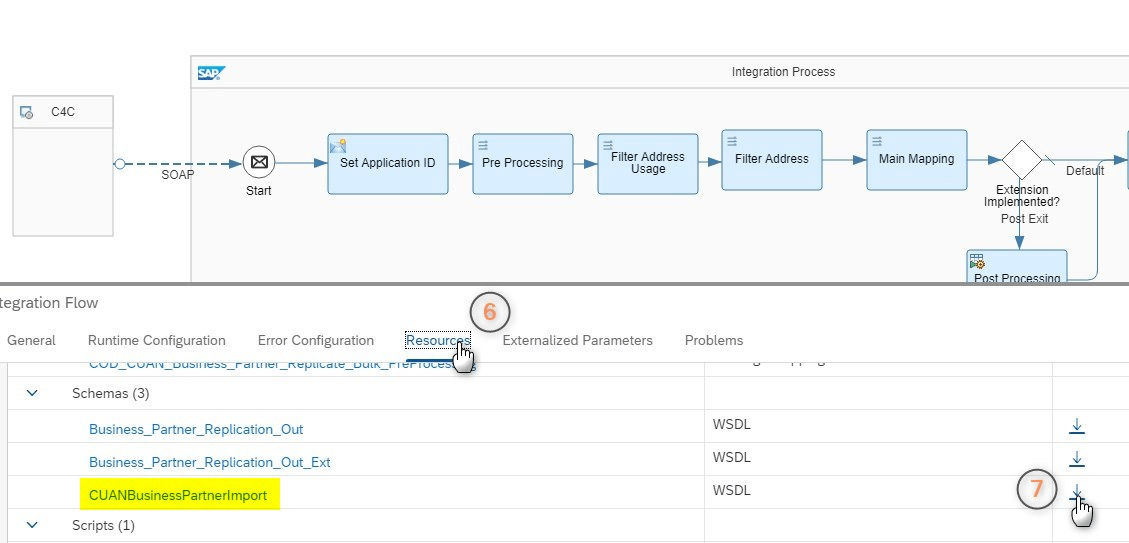
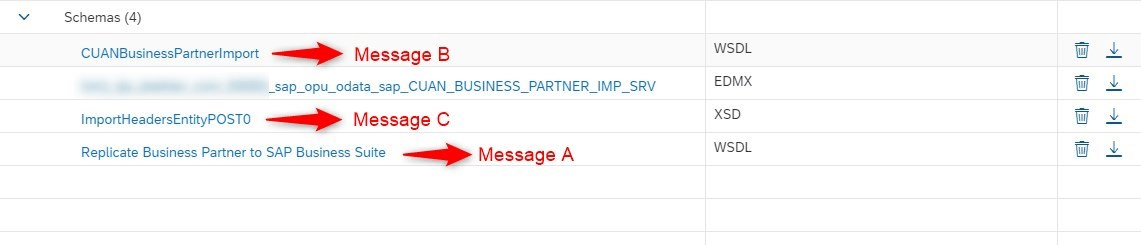
This is relatively easy because it’s already available in the standard integration flow. You can download it from the “Resources” tab of “Replicate Business Partner to SAP Marketing” integration flow once you identify which schema you should download (Figures 1.23 – 1.26)

Similar to Message A, you can also rename this service metadata.
2.4. Getting Extended Metadata of SAP Marketing OData Service (Message C)
This part is a bit tricky. Fortunately, I already created a blog series that explain how to create a custom field in SAP Marketing and enable it for the required OData services. Furthermore, it also explains how you can get the latest version of an OData service metadata (including our custom fields) from SAP Marketing. Kindly note that though our custom field (ZZ1_S4ID_ENH) and our OData service (CUAN_BUSINESS_PARTNER_IMP_SRV) differs from the ones explained in the referenced blog, the principles remain the same.
To find out how to create a custom field and enable it for our OData services click here.
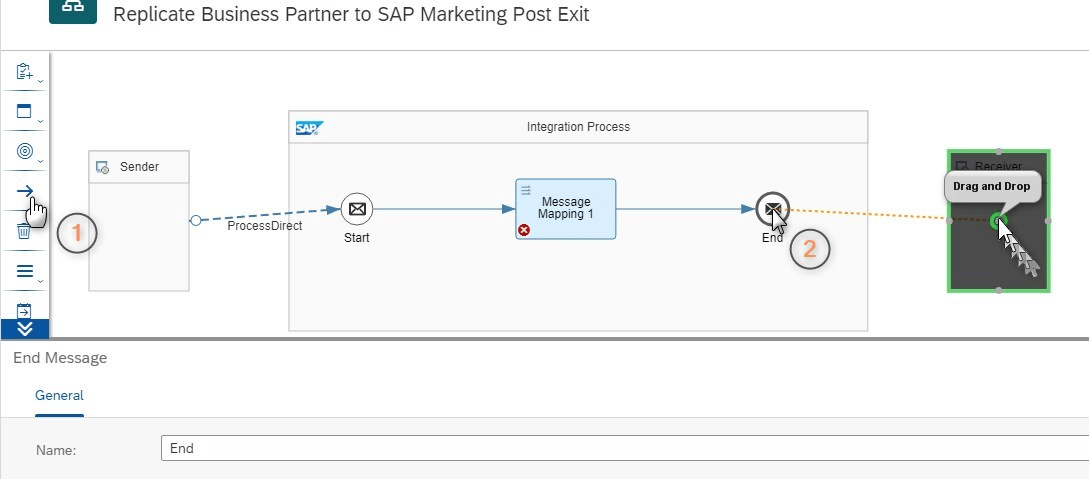
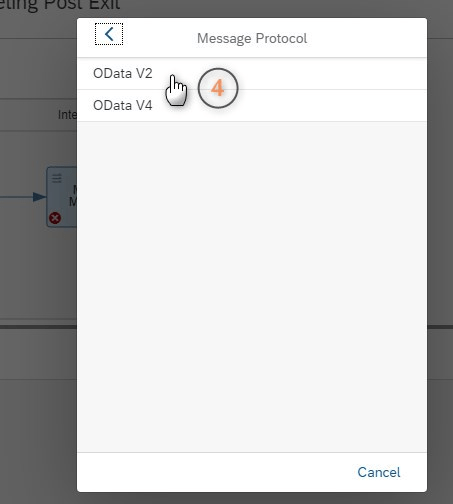
To get the latest metadata of OData services from SAP Marketing, we first need to create a connection between “End” icon and “Receiver” box and choose OData as Adapter Type in our Post-Exit Flow (Figures 1.27 – 1.31)


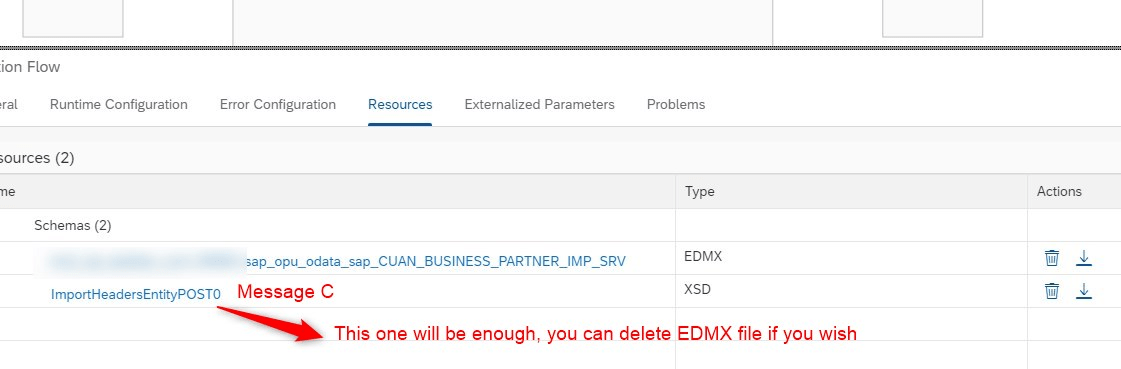
From this point on, the steps are quite similar to those explained here in this blog. We just need that schema generated at the end with .XSD extension. If you follow the steps and get the latest metadata from OData service CUAN_BUSINESS_PARTNER_IMP_SRV, you will have a list like the following in the “Resource” tab for your Post-Exit integration flow (Figure 1.32)
Now that Message C is in place you can delete the connection between “End” and “Receiver”, and even the “Receiver” itself in our Post-Exit flow design.
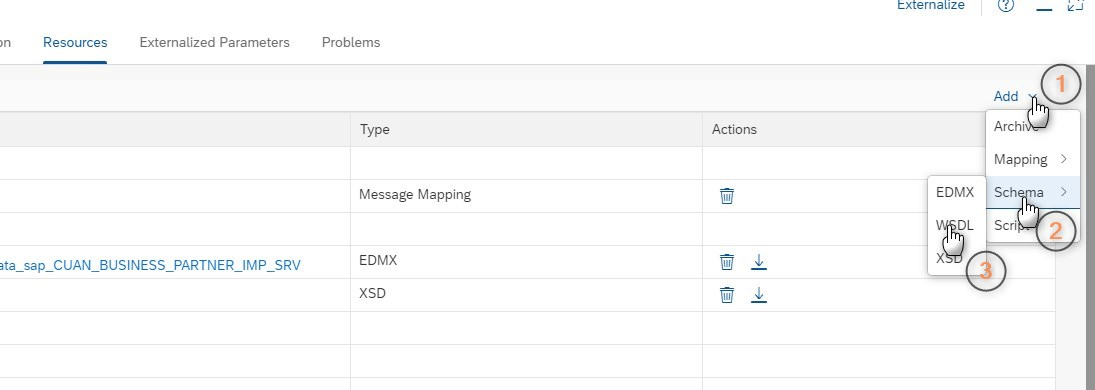
We need to add Message A and Message B as well to our Post-Exit integration flow resources [We downloaded them in the steps “2.2. Getting Extended Metadata of C4C SOAP Service (Message A)” and “2.3. Getting Standard Metadata of SAP Marketing OData Service (Message B)” respectively]. You must select the WSDL files from your PC folders that you downloaded them to (Figure 1.33)
If you didn’t rename the WSDL files after you downloaded them to your computer, you should end up with a resource list as shown below (Figure 1.34)
2.5. Performing Post-Exit Mapping
We’re all set, so we can perform our mapping as we have got all the sources that we need. Once you select the mapping to go into details you can follow the below screenshots as they demonstrate how to select your sources in order, and how you can perform our mapping according to our scenario. We should map our custom field from C4C (ZZMKTS4ID) with our custom field from SAP Marketing (ZZ1_S4ID_ENH) in addition to existing mapped standard fields (Figures 1.35 – 1.44)


3. Deploying standard integration flow and Post-Exit flow
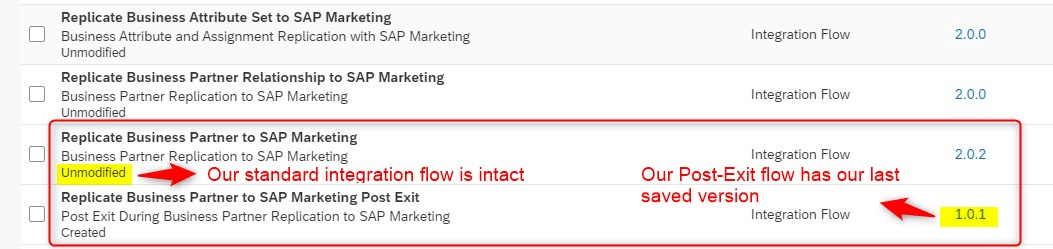
We configured our standard integration flow before and now we have finished the configuration of our Post-Exit flow. We need to deploy them to see them in action. We first need to deploy the standard integration flow “Replicate Business Partner to SAP Marketing” and then our Post-Exit flow “Replicate Business Partner to SAP Marketing Post-Exit” (Figure 1.46)

4. Testing Standard Integration Flow and Post-Exit Flow
Once our standard integration flow and Post-Exit flow are deployed, we are ready to test them. Log in to your SAP Cloud for Customer system with your credentials and make a small change for your test customer. In our case, our custom field should be updated with S/4 HANA number (Figure 1.47)
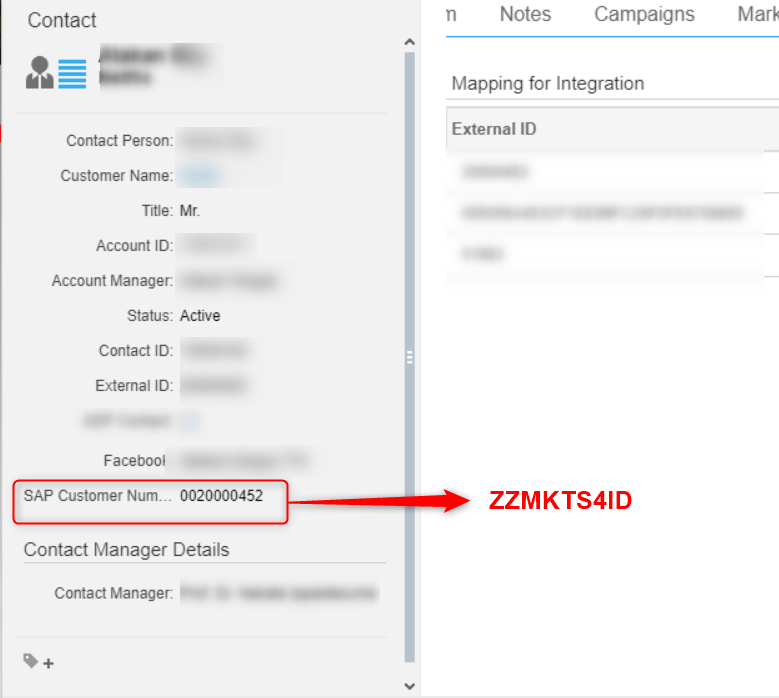
You can check the payload of this change in SAP C4C via “Web Service Message Monitor” and you can also check if there’s any error for that outbound message. We can confirm that our custom field (ZZMKTS4ID) gets the value “0020000452” in the corresponding payload (Figure 1.48)

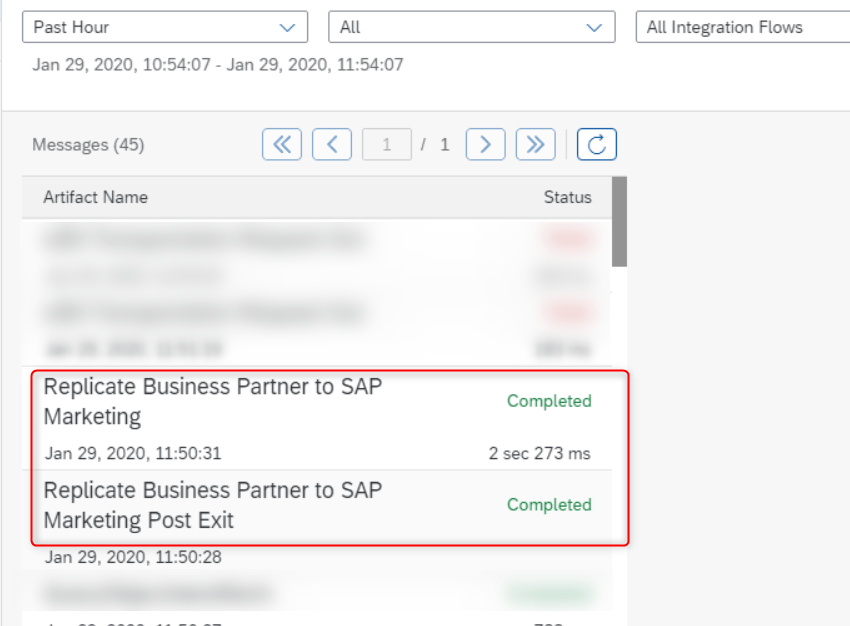
We should see our standard integration flow and Post-Exit flow are triggered successfully in CPI (Figure 1.49)
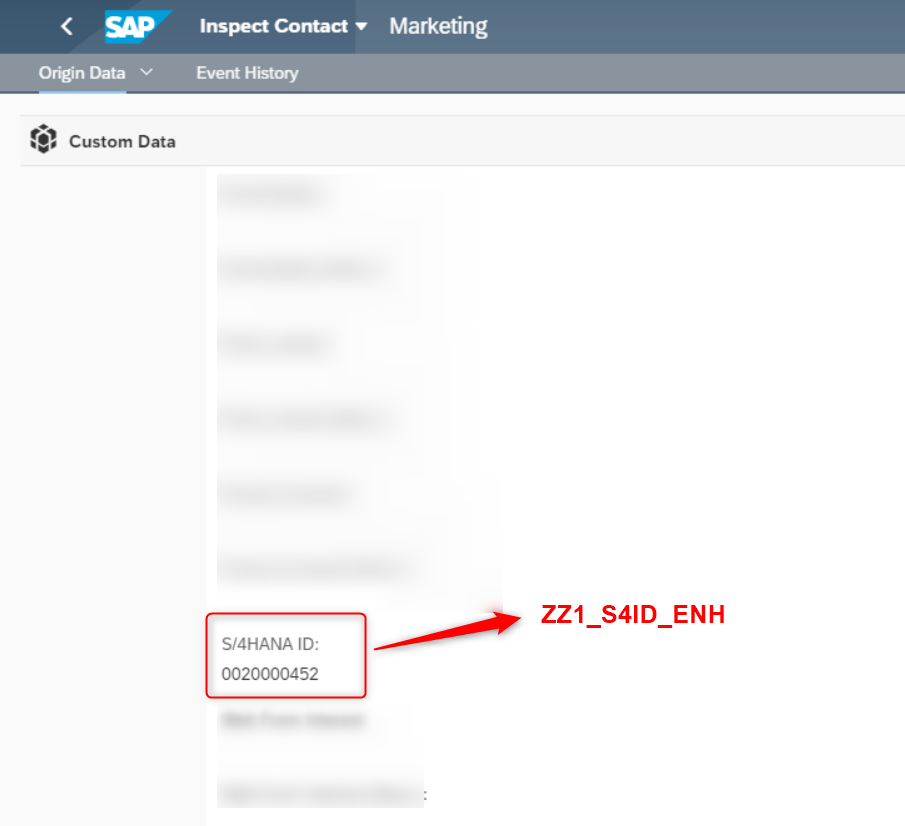
For the last step, we can check if our mapped custom field in SAP Marketing (ZZ1_S4ID_ENH) gets the right value. We can do this by searching for our test customer via “Inspect Contact” app in the “Data Stewardship” section in our SAP Marketing system. We need to check the origin data for SAP C4C for our test customer (Figure 1.50)
Summary
That’s it! You should be able to extend your integration flows for your custom integration scenarios. With this new functionality;
- You don’t need to worry about later releases for your standard integration package; The standard integration flows always remain intact and thus unmodified
- Based on the previous point, you don’t risk any update or bug fixes applied by SAP to standard integration content (standard integration flows)
- All your extension activities are carried out in a separate custom integration flow so you have to work with less resources and less CPI elements (only one mapping actually)
- You save a lot of time as you won’t be performing your extension activities over and over again because your Post-Exit flow will always be there after you upgrade to a newer release of your integration package.
Good luck with your extensions!